
By Neil Byrne – Dublin HEMA Club
Foreword: This gem of an article was shared with us in 2013 and has been in our group’s files ever since. We have decided to make it more publicly accessible on our blog site, because it solves a very important problem concerning many women in HEMA: Ill fitting, restrictive, and ineffective chest protection.
The original Boob Shield featured here is now nearly 4 years old. It is still going strong, giving its owner much protection and comfort when fighting. Making the Boob Shield might take a second pair of hands, but is an effort worthwhile.
The following is a set of instructions on the construction of a tailor-made dense plastic polymer chest protector for individuals involved in HEMA. I came up with the design, because I was unhappy with the terrible levels of protection for women in the hobby and did not want my fiancée getting hurt. I am providing this document for women who want better levels of protection than are currently available. All I ask is that you give recognition for the design if asked and provide it free to others. While I am happy with people distributing this document, it is a freeware design. If you want to make money, then please develop your own. All materials are easy to obtain, the main ingredient is a thermoplastic called Polymorph which can be easily bought online. I hope you find these instructions useful and that they allow you to enjoy HEMA safely for years to come.
Step 1.
Take your polymorph and place in a pot of water. Be sure to cover the all polymorph with water. Turn on the heat. You will know the polymorph is ready, when it becomes clear and the beads starts to stick together.
Step 2
While I did not do this myself, it is probably a good idea to cut out a rough pattern of the area you will be covering. If you do not wish to do this, measuring the approximate area to be covered will save time later.
Step 3
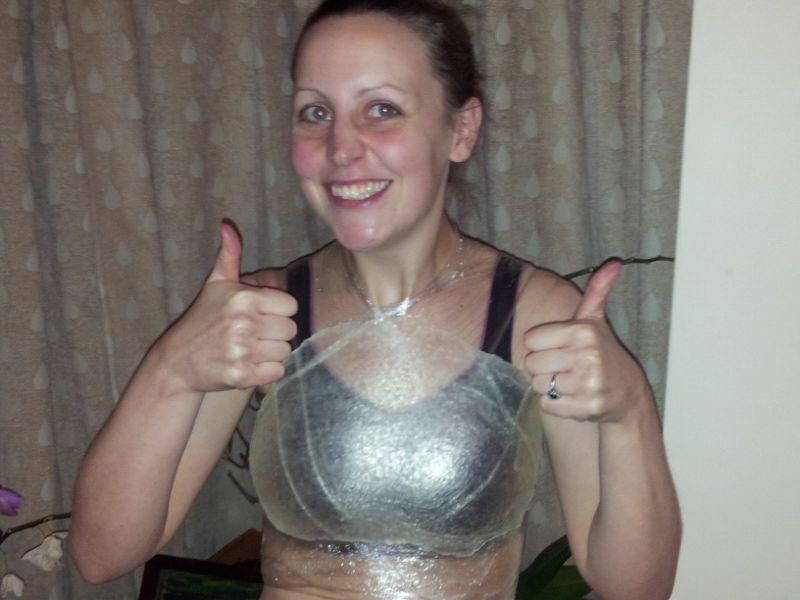
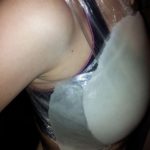
The person to use the shield later wears an appropriate sports bra or similar garment they normally train in. Wrap their upper body in clingfilm.
Step 4
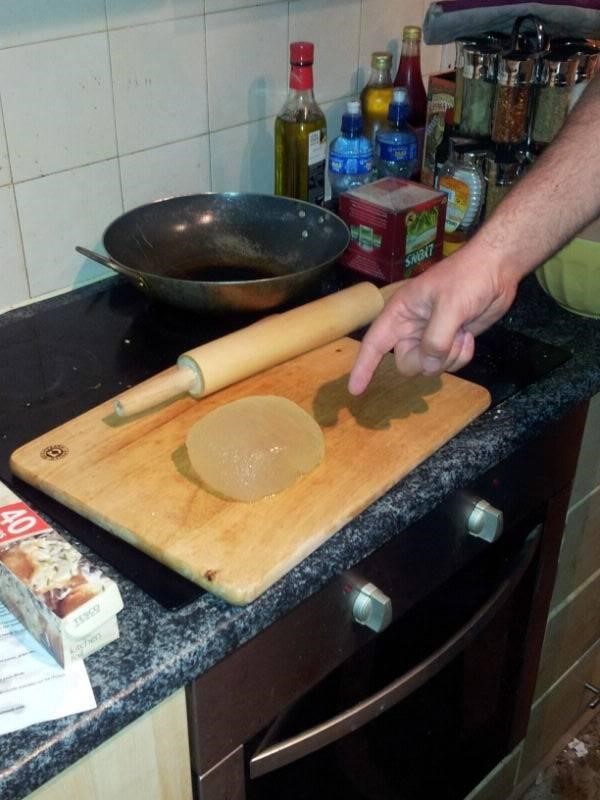
Take your heated lump of polymorph out of the water and put onto a board to roll out into shape with a rolling pin.
Step 5.
Now take your flattened piece of thermoplastic and spread it across the area to be covered. If you have measured your piece out, you should now have a single layer of thermoplastic covering the front of the chest. This is the key part of this design; the thermoplastic is mouldable while it is warm. Paying special attention to the contours of the body, shape the polymorph to their chest! It will take a few minutes before it starts to harden, but the faster you work the better.
It is much easier to to make holes at the top of the chest piece where the shoulder straps are going to be fitted before the plastic hardens.
Step 6
Now you have the front piece done, it is time to add the side pieces. Again, you should measure the area you are going to cover first. Get another ball of softened polymorph and roll it out into the shape and size to add. Whilst still hot and soft, add it on.
The polymorph will immediately start to bind to the front chest piece, so you only need to worry about trying to get a neat fit.
As above, it is a lot easier later if you make holes for the back straps at this point. If however you do not, you can simply dip the section where the holes will be back in hot water to re-soften, so you can cut out holes.
Step 7
This is a personal preference again. My fiancée wanted a bit more protection below the breast, so I added a strip along the bottom of the entire protector to give protection to her solar plexus and upper abdomen. The soft polymorph will bind easily to the pieces already there. After all pieces were hardened, I added additional strips over the seams to reinforce the joints. You probably do not need to do this, but I wanted extra strength and it used very little polymorph.
Step 8
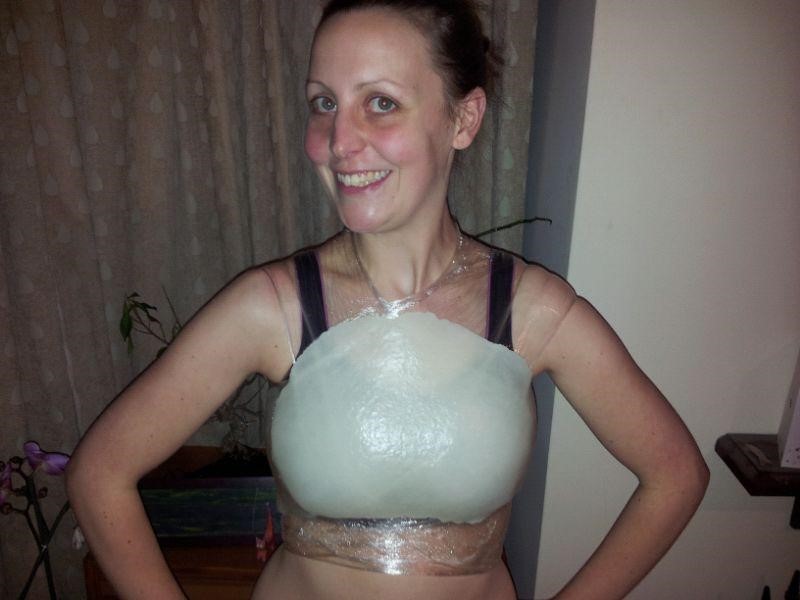
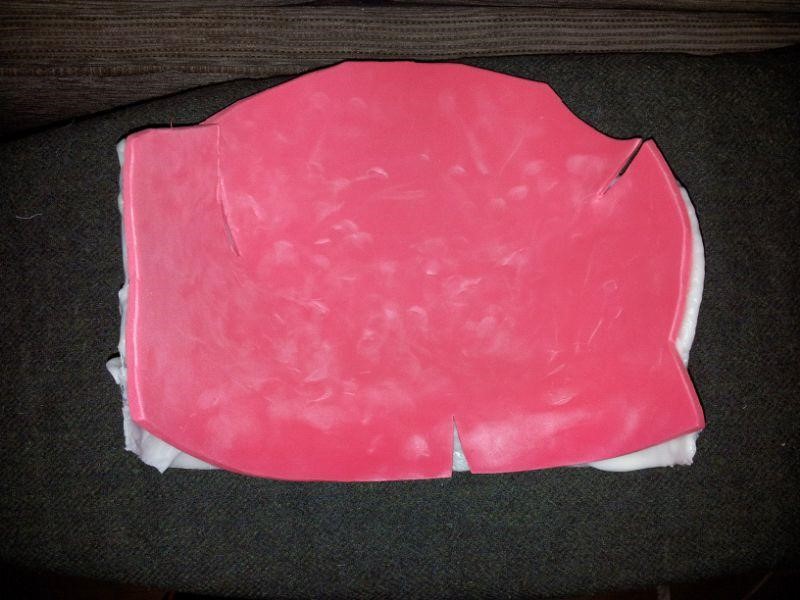
After constructing the protector it is time to move on to padding. The padding I used was a foam camping mat, the likes of which can be bought for less than €10. The correct size and shape was cut out remembering to cut notches, so it will fit inside the cups nicely.


Step 9
You have to glue the padding to the inside of the chest protector. I know other groups used double-sided adhesive tape to stick this type of padding to armour. I used a spray-on contact adhesive. Use whichever adhesive you find easiest to work with. The only tricky bit is making sure the padding attaches smoothly. So you may need help holding it in place as you press it against whatever adhesive you decide to use. The finished product after this step should look something like this.
Once the glue has dried, you trim the edges. An advantage of spray-on contact adhesive was that I could roll the padding over the edges for added protection against the edges cutting into the torso.
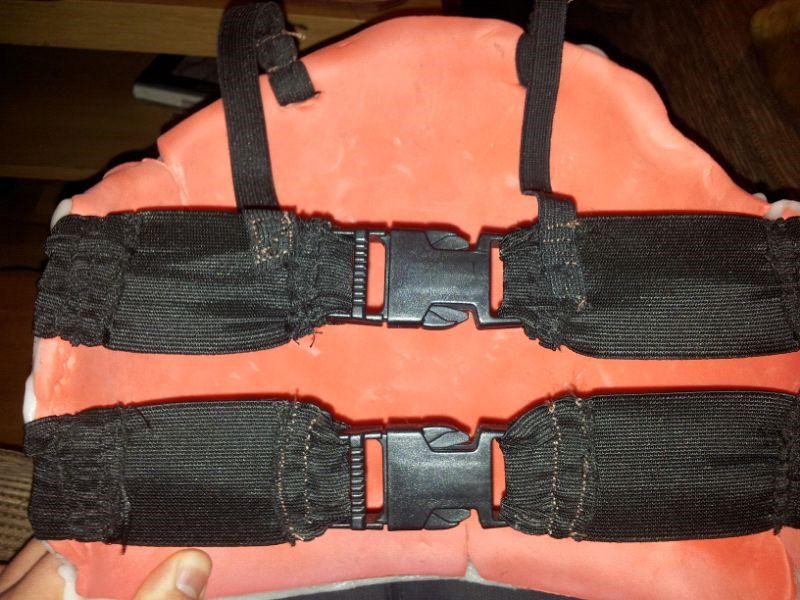
Step 10.
You are now ready for the final step which is adding elasticated straps. I used two back straps with clips to close them and two shoulder straps. We found it impossible for my fiancée to pull the protector over her head, due to the tight fit and her large bust. So this is why we added clips to the back. Depending on your body shape and how tight you want the fit, it may be possible to just use elastic straps, which allow you to pull the protector on over your head. The final straps looked like this.
Step 11
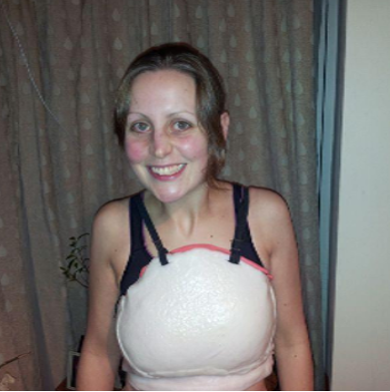
My beautiful fiancé, Suzy, modelling the finished product.
Summary
It is a fairly simple process to make a properly fitted chest protector. All you need is a few inexpensive materials, some time and a close friend to get the fit right. While I designed it for women, there is no reason it could not be used for men, too. The finished product is an extremely solid, bespoke piece of protective equipment, which does not interfere with movement and is not a “one size fits none”!
My fiancée is a 32 E cup with 40 cm shoulders. I used approximately 850 grams of polymorph to create a chest protector about 1 cm in thickness, which is probably thicker than you need. The polymorph was ordered on Ebay, the straps/clips bought in a textiles shop, the camping mat at Argos and the contact adhesive in a local hardware store. In total the entire cost of materials was approximately €30. The polymorph can be reused many times. If you make a mistake and the polymorph hardens, simply reheat it and it will go soft again. You can do this as many times as you have to until you get it right.
Good luck making your Boob ShieldTM!
I would like to thank my fiancée Suzy for agreeing to model for me during this process and for correcting the English in this guide.
All photos by Neil Byrne, apart from title photo by Suzie Cantrell
The views expressed herein are those of the author and not necessarily the views of Esfinges.